What happens when your trusty leather boots get a cut or tear? Do you toss them out and start the search for a new pair? Not so fast. With a little bit of know-how and some simple tools, you can easily repair cuts in your leather boots and extend their lifespan.
In this blog post, we will guide you through the process of fixing cuts in leather boots with ease. From identifying the type of leather to selecting the right tools and materials, we’ve got you covered. By the end of this post, you’ll have all the knowledge and skills needed to mend those pesky cuts and keep your favorite boots looking as good as new.
So let’s roll up our sleeves and get started. Here’s what we’ll cover:
- Identifying the type of leather
- Cleaning and preparing the area
- Choosing the perfect adhesive or filler
- Applying the repair product
- Buffing and polishing for a seamless finish
Don’t let those cuts bring down your beloved boots – follow our expert tips and tricks for a successful repair job. Let’s dive in and give your boots a new life.
What Can Cause Cut in Leather Boots?
Contents
When it comes to cuts in leather boots, there are several factors that can contribute to their occurrence. These include sharp objects, rough terrain, inadequate maintenance, and incorrect sizing. To avoid these issues, it’s essential to be aware of your surroundings when handling sharp objects and choose more durable leather materials for outdoor activities.
Additionally, maintaining your boots by regularly cleaning and conditioning them is crucial in preventing cuts and other damage. Ensuring a proper fit is also important in reducing the risk of cuts and tears.
In the case of minor cuts or tears, you can easily fix them with everyday household items like leather glue and patches.
However, for more significant damage, it may be necessary to seek professional repairs. Proper care and maintenance can also help prevent future cuts and tears from occurring.
Regularly checking and caring for your leather boots will not only extend their lifespan but also keep them looking their best.
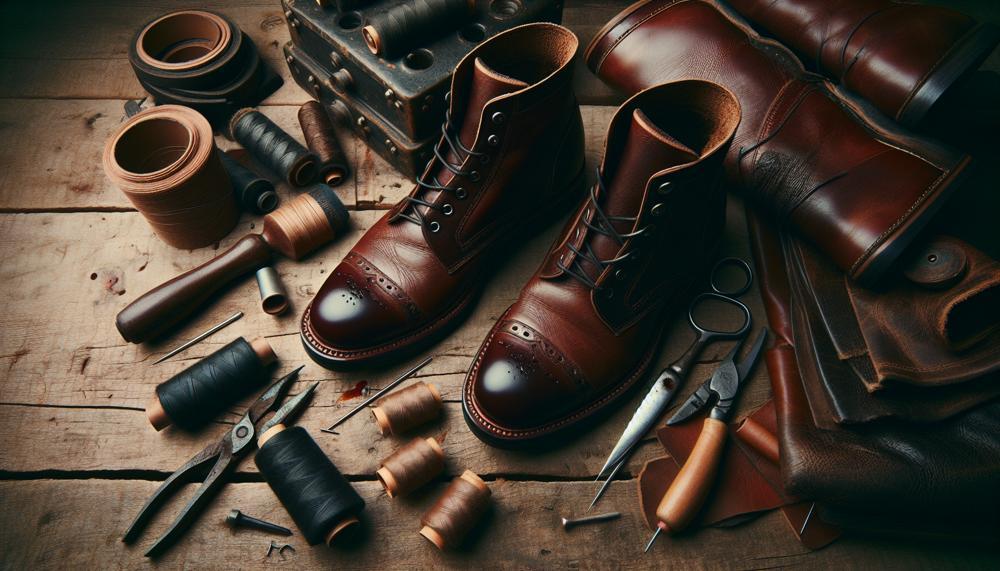
Required Items
When repairing a tear in leather boots, you’ll need some essential items: leather glue or adhesive, a leather patch (if needed), sharp scissors, sandpaper or a leather sander, leather conditioner, a clean cloth, and leather dye or polish. These tools are crucial to ensuring a durable and effective repair while also preserving the appearance of the boots.
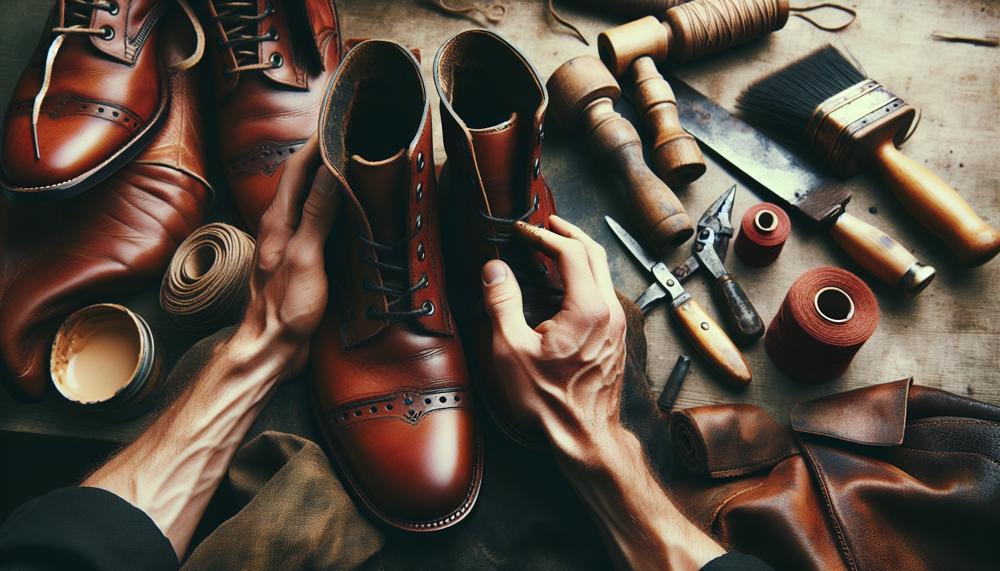
To fix a cut in leather boots, the first step is to clean the area around the tear with a damp cloth.
Next, use sharp scissors to carefully trim any loose threads or pieces of leather. Then, lightly sand the edges of the cut to roughen them up for better adhesion.
Apply a small amount of leather glue or adhesive to both sides of the cut and press them together firmly. If necessary, place a leather patch over the cut and secure it with more glue.
After letting the glue dry completely, use sandpaper or a leather sander to smooth out any bumps or rough edges. Once the surface is even, apply a thin layer of leather conditioner to nourish and protect the repaired area. Finally, use leather dye or polish to restore the color and shine of your boots.
With these simple steps and essential items, you can easily fix any cuts in your leather boots and keep them looking as good as new.
How to Fix a Cut in Leather Boots
Repairing a cut in leather boots can be a daunting task, but with the right techniques and supplies, you can easily fix it yourself. Here are 10 effective ways to repair a cut in leather boots:
| Method | Supplies Needed |
| Glue Method | Leather glue, sandpaper, leather patch |
| Stitching Method | Needle, thread, scissors, leather adhesive |
| Leather Filler Method | Leather filler, spatula or knife |
| Take to a Professional Cobbler | N/A |
| Clean and Condition Regularly | Clean cloth, leather cleaner and conditioner |
| Trim Loose Ends and Roughen Area | Sandpaper, scissors |
| Use Colorant to Blend Repaired Area | Matching colorant or dye |
| Affix a Leather Strip for Larger Cuts | Adhesive, leather strip |
| Use Leather Filler Compound for DIY Repairs | Leather filler compound in matching color |
| Reshape the Toe Area of Boots | Plastic bags, water, freezer (optional) |
8 Maintenance Tips
| Maintenance Tip | Description | Additional Tips |
| Regular Cleaning and Conditioning | Frequently cleaning and conditioning your leather boots will keep the material supple and less susceptible to cuts or tears. | Use a soft cloth to remove any dirt or debris from the surface of the boots. Apply a leather conditioner to prevent dryness and cracking. |
| Polish for Added Protection | Applying a cream or wax-based polish can add moisture and nourishment to the leather, while also creating a protective barrier against damage. | Use a soft cloth in a circular motion to apply the polish. Let it dry before buffing with another cloth for shine. |
| Incorporate Waterproofing Agents | In wet climates, using a waterproofing agent can help safeguard against water and salt damage. | Choose a product specifically designed for leather boots. Apply as directed and let it dry completely before wearing. |
| Avoid Heat Sources for Drying | Avoid using external heat sources to dry wet boots, as this can cause the leather to crack or shrink. Allow them to dry naturally at room temperature. | If your boots get wet, stuff them with paper towels or newspapers to absorb moisture and maintain their shape. |
| Be Mindful of Sharp Objects | Avoid walking on sharp objects or storing your boots in areas where they may come in contact with sharp objects. | This will help prevent cuts or tears in the leather material. |
| Invest in Quality Leather Boots | Choosing high-quality, handcrafted leather boots, such as those from Thursday Boots, can ensure durability and longevity. | Thursday Boots uses 100% USA bovine leather, making them a reliable and sustainable option. |
It is also crucial to assess the severity of any cuts or tears in your leather boots. For minor damage, simple household items can be used to fix the issue, while more extensive damage may require professional repair.
By taking good care of your leather boots and being cautious when wearing or storing them, you can prevent cuts or damage and enjoy your stylish and durable footwear for years to come.
3 Tips to Make the Leather Boots Last Longer
| Tips | Description |
| Opt for premium leather | Invest in full-grain leather for its durability and the beautiful patina it develops over time. |
| Protect with spray or wax | Apply a protective barrier to shield against water damage and maintain the suppleness of the leather. |
| Clean and moisturize regularly | Remove dirt and debris while moisturizing to prevent cracks and dryness in the leather. |
| Store properly | Keep boots in a cool, dry place out of direct sunlight and use breathable storage options. |
| Rotate your boots | Giving your boots a break between wears allows them to breathe and prevents excessive wear in one area. |
| Repair damage immediately | Assess the severity of any cuts or tears before attempting to fix them yourself. Use glue and leather patches for minor cuts and stitches for deeper cuts. |
If you want your leather boots to last longer, it’s important to not only take preventative measures but also address any damage as soon as it occurs. Regularly cleaning and conditioning your boots can help maintain their quality, preventing cracks and dryness. And when it comes to minor cuts or tears, a little bit of glue and reinforcement can go a long way in extending the life of your boots. Remember, taking care of your boots means they’ll take care of you for years to come.
To ensure that your leather boots withstand the test of time, it’s crucial to choose high-quality leather. Full-grain leather is known for its durability and the natural patina it develops over time, making it an excellent investment for long-term wear. Additionally, using a protective spray or wax can help shield your boots from water damage, while regular cleaning and moisturizing will keep them looking and feeling their best.
Proper storage is also essential for maintaining the longevity of your leather boots. Be sure to keep them in a cool, dry place, away from direct sunlight. Using breathable storage options will also help prevent any moisture buildup, which can lead to mold and mildew.
Another tip to make your leather boots last longer is to rotate them regularly. Giving your boots a break between wears not only allows them to breathe but also prevents excessive wear in one particular area, ensuring that they maintain their shape and structure over time.
In cases of damage, it’s crucial to address it immediately.
Conclusion
In conclusion, repairing a cut in leather boots may seem like a daunting task, but fear not. With the right knowledge and tools, you can easily fix those pesky tears and extend the lifespan of your favorite boots.
By identifying the type of leather, properly cleaning and preparing the area, selecting the perfect adhesive or filler, and finishing off with buffing and polishing, you can successfully mend any cuts in your leather boots.
It is crucial to be mindful of sharp objects and regularly maintain your boots to prevent future damage. However, accidents can still occur even with careful handling. That’s why it’s essential to always be prepared with basic repair supplies such as leather glue and patches.
To ensure that your leather boots last longer, invest in high-quality materials like full-grain leather, use protective sprays or waxes, and regularly clean and moisturize them. Proper storage is also key in maintaining their longevity.
And if any damage does occur, address it immediately using appropriate techniques based on the severity of the cut or tear.
Remember, taking care of your boots means they will take care of you for years to come.